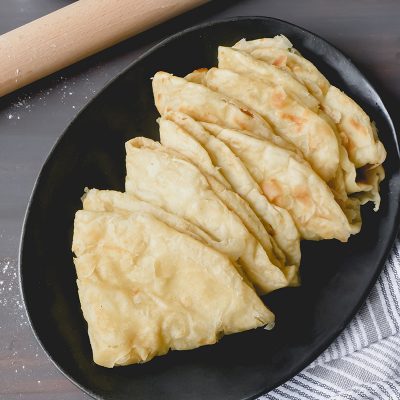
Paratha (Oil) Roti
This flatbread may come in a variety of forms, but this Guyanese-style paratha (or oil) roti with it's soft and flaky layers will have you easily making this in your own kitchen to serve with your favourite curry dish.
Servings: 4 roti
Ingredients
- 3 cups all-purpose flour plus 1/2 cup for dusting
- 2 tsp baking powder
- 1/2 tsp salt
- 1 1/4 cup warm water
- 4 tbsp oil, ghee, or butter room temperature
- 1/4 cup oil for cooking/basting
Instructions
Knead the dough
- In a large bowl, whisk together the three cups of flour, baking powder and salt until incorporated.
- Slowly add in the water, ¼ cup at a time, kneading until your mixture forms a shaggy, slightly sticky dough.
- Cover the bowl with a damp paper towel and let it rest for 30 minutes.
Wrap the roti
- After the dough has rested, divide it into 4 equally sized balls (also known as loyahs). Take one ball and flatten slightly into a thick disk. Coat it in the extra flour, making sure to lightly dust your work surface to prevent any sticking. Press it with a rolling pin into a larger circle.
- Spread the ghee or oil over the surface. Dust the surface of the oiled dough with a bit of flour.
- Cut a slit from the centre of the circle out to the edge of the dough. Fold and roll the edge around to make a cone, being sure to tuck the end back into the centre at the bottom. Tuck the outer ends of the cone back into the dough as well.
- Place the cone on your work surface and gently push the tip of it into the base. Repeat with the remaining 3 dough balls.
- Cover with a damp cloth and allow to rest for an additional 30 minutes.
Roll and cook
- Heat a heavy-bottom frying pan or tawa over medium heat.
- Work with one dough ball at a time: On a lightly floured surface roll each ball into an approximately 8-inch circle (or about the size of your pan).
- Coat your pan with a thin layer of oil and place the flattened roti into the pan.
- Cook for about 20-30 seconds until you see small bubbles form on the top surface. Brush the surface of the roti with oil. Carefully flip over to cook the other side for about 30 seconds more, brushing more oil on the surface. Flip again and cook the first side until the roti is a light-golden colour (30 seconds).
- In order to keep the roti soft, you have to "clap" it: a simple way to do this is by placing it in a covered bowl and shake it to help release the air pockets while it’s still warm. You can also use two, long wooden spatulas (also known as dablas). While the roti is almost done cooking, use the spatulas to squeeze the edges of the roti toward the centre, until you see the layers start to form.
- Keep the cooked roti covered in a clean kitchen towel until ready to serve.
Video
Notes
- A combination of your fat can also work well for this recipe. Try mixing canola oil with ghee or butter, or even shortening.
- You don't want this dough drying out, so be sure to keep it covered with a damp paper towel, cloth or plastic wrap as you're working on each of the dough balls.
- The thickness of your roti is a personal preference, keep in mind that the thicker you roll out your roti, the longer it will take to cook on the stovetop.
- Have your extra flour in a small bowl, so that you can dip your dough balls in before you roll. Too much flour on the surface will stiffen up the dough.
- This dough becomes much softer the longer it is allowed to rest. If you find it springing back when you're rolling it, cover it and give it more time for the gluten to develop.
- You can roll out each roti (one at a time) in the final step while the previous one is cooking on the stove top to save on time.
- This roti can also be made the night before and refrigerated prior to cooking. Before the final roll, cover and refrigerate the dough for up to three days, and allow to come to room temperature before rolling and cooking.